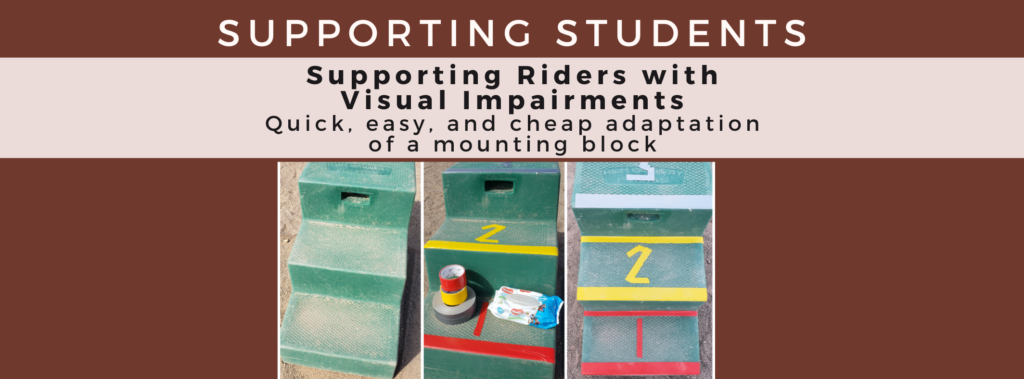
Supporting Riders with Visual Impairments- Quick, easy, and cheap adaptation of a mounting block
Necessity is the mother of invention.
As instructors we often have to adapt on the fly to make things work the best they can for the student we are working with in that moment.
Today was one of those days I had to quickly adapt…and it just happened to my equipment, and I needed to use things I already had.
Honestly, I should have figured this out a while ago but just had a light-bulb moment this week while editing a video of this particular student mounting that will be put into the educational resources of The Intuitive Instructor Club (Another reason I suggest fellow instructors record their teaching every so often! It can spur some great thoughts and self-reflection)
Materials Needed & Instructions:
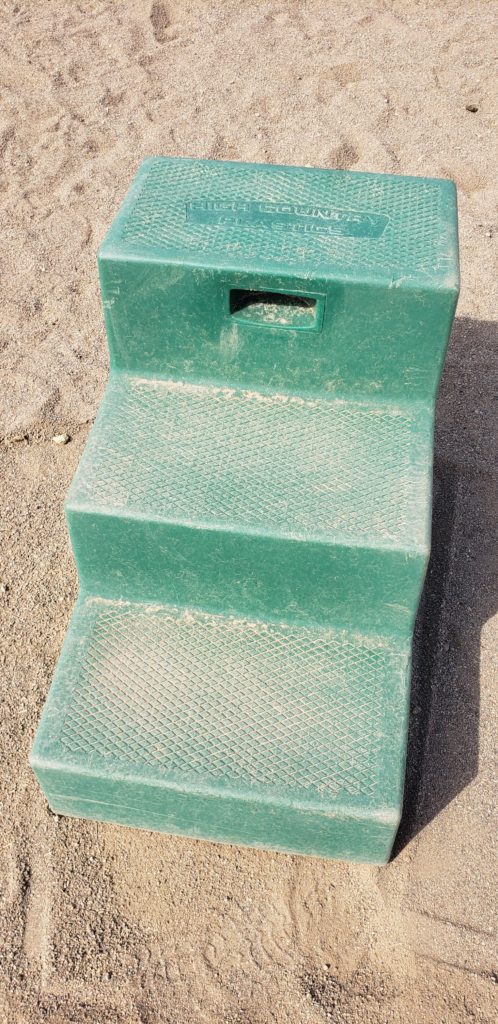
- Baby wipes
- Duct Tape– different colors
- Mounting block (2 or 3 steps)
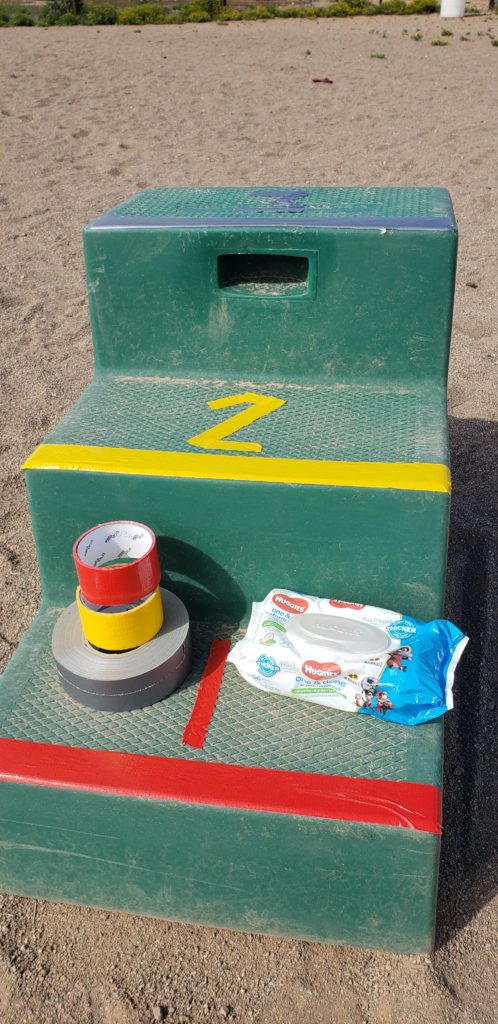
It took me less than 5 minutes and 2 steps and the materials listed above (that were already hanging around my barn) to adapt my block to be more visually friendly!:
- Wipe off steps with baby wipes
- Place duct tape strips on edges and make numbers out of smaller pieces
Note: The material list were all items I regularly have around the barn because of how frequently I use them. Baby wipes are great to have handy to clean off hands or arms (especially during fly-spray season). I use duct tape all.the.time. (arena markers, horse movement analysis, fixing things, making labels, etc.)
Because of the materials I used and how frequently I use the block, I know it won’t last forever…but it was a quick, cheap solution that works! I may update the lines and numbers to a more durable paint in the future.
Although the student that inspired this adapted block does not ‘need’ the numbers, I put them on there while I had the materials out. I put numbers on so I can use them with my younger students or those that are working on recognizing numbers, counting, etc.
Adapting the adaptation
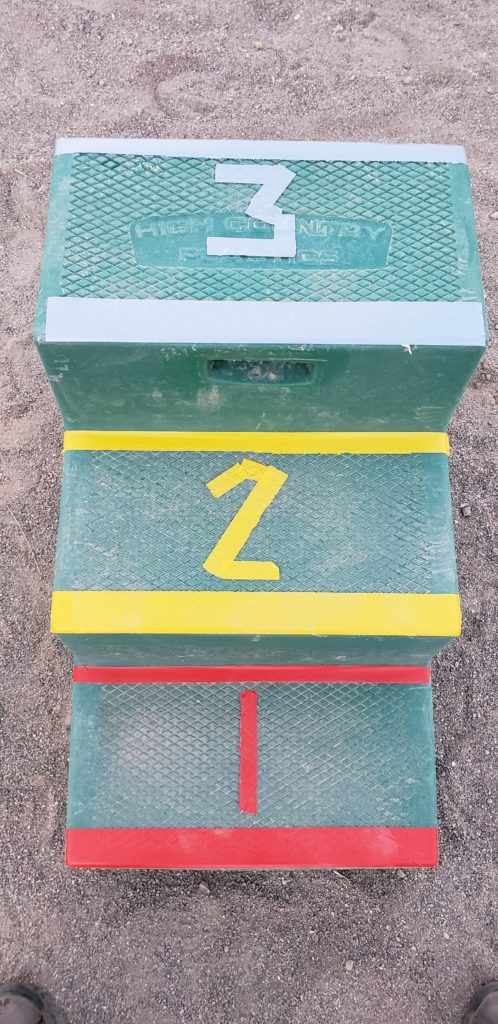
A fellow instructor saw the ‘first’ version of the adapted block and gave some great feedback. She herself has spent most of her life without depth perception so was able to give advice based off firsthand experience.
The first version of the stairs had a strip of tape on the ‘front’ edge and numbers on each step.
After seeing a photo of the first version of the adapted block, my fellow instructor suggested I put a second strip of tape at the ‘back’ edge of each step.
She said that this second strip would help the rider know to step and place their foot between the two lines of the same color. The strip on the back would also it would also help indicate how high, and to where they should lift their foot for the next step.
She noted that the back edge of the step blended into the rise of the next stair which make the height and size of the step difficult to see.
I’m very thankful for her input! Collaborating is key and we can learn something new from each other every day!
Note: The colors I used were ones that happened to be available in that moment due to the tape rolls I had at my barn. If you have a student who is color blind, you may want to use colors they can see. At the time of writing this I did not have any students with color blindness so that factor is not accounted for in this version/color. I would need to update the tape colors if so. Thank you to another fellow instructor for pointing out this additional factor that we should consider when choosing colors!
The Student that Inspired this Adapted Block
I recently had a student with depth perception difficulties start in my Adaptive Riding program. She is also non-verbal so she cannot communicate how she is feeling or what she needs quite as easily as someone who can quickly verbalize with words. We have our own way of communicating but have had to adapt and learn together.
My student’s depth perception challenges are noticeable when she is navigating the world around her. She is very cautious and seeks physicals support if she sees what appears to be a change in the terrain (a hose running across the ground, a dark spot in the sand, etc). She is unable to see how much the terrain lowers or raises so she seeks physical support from those around her and often slows down her movements around these unknown items.
Her trouble with depth perception is also very apparent when using the mounting block.
She loves to ride and is eager to mount but hesitates at the steps until I provide not only physical assistance but also help her navigate the stairs.
Before the adapted block: She waits until I put my foot on the first step…then she does the same…then waits for me to step onto the second one…then she steps again…and same for the third.
So…then came the light bulb moment while editing a video I had taken of her mounting during her third lesson with me. The steps blend together because they are the same color so she can’t tell where to step or how high to lift her foot!
I sat there thinking what could I do to help facilitate further independence for this student during the mounting process. What could take the place of my foot physically prompting where the step was? The answer that popped into my brain was a visual marker that we see on ramps, stairs, and other things use use out an about in everyday life.
I was not sure if this idea would work. You never know until you try!
It worked!
I did the final edit of this blog post-lesson and I’m happy to report that the adaptation to the mounting block worked as hoped!
Not every adaptation or idea like this is successful so when that happens we just have to observe, regroup, and try something different!
My student climbed the stairs without any hesitation or needing me to place my foot on each step before she would place her foot. She briefly used my arm as support until she was able to reach out and stabilize herself on the saddle…but it was amazing to see how much easier she was able to navigate the block.
The video above shows a mounting platform with additional visual support to help support a wide variety of riders and incorporate Equine Assisted Learning moments.
Want to learn more about topics mentioned in this post? Check out the Intuitive Instructor Content below:
This section in the IIC has a video on Adapting the Mounting Block taught by Saebra Pipoly-PATH Intl. Advanced Therapeutic Riding Instructor
This section in the IIC has an hour-long video on Vision Impairments – Analyzing Disabilities with an “Instructor’s Eye” taught by Amy Sheets- PATH Intl. Master Therapeutic Riding Instructor
You are currently on Hoof Falls & Footfalls’ learning platform. Return to our main website HERE.
Hoof Falls & Footfalls is supported by YOU! Each time you buy through affiliate links from my site, I may earn commission (at no extra cost to you). Commissions help me continue to provide free and affordable education to adaptive/therapeutic riding instructors and other Equine Assisted Services industry professionals.


Responses